1. Remove ECM from vehicle.
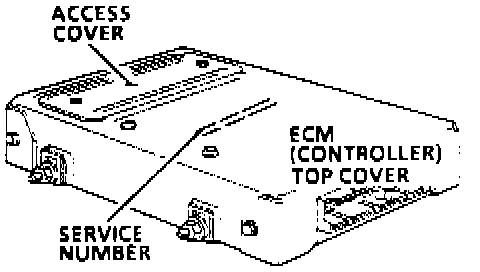
2. Remove ECM access cover.
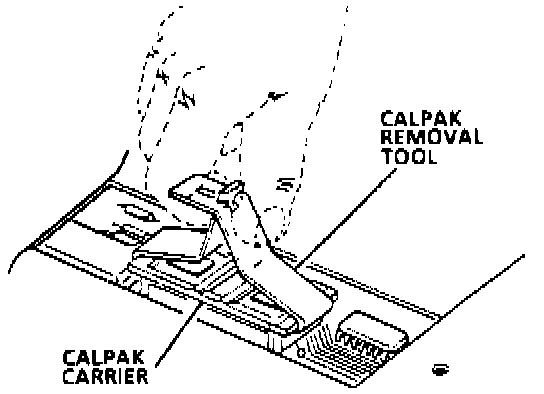
3. Remove Calibration Pack (CALPAK) using removal tool shown. Grasp the CALPAK carrier on the narrow ends only. Gently rock the carrier from end to end while applying a firm upward force.

4. Inspect the reference end of the CALPAK carrier and carefully set aside. Do not remove the CALPAK from the carrier to confirm CALPAK correctness. The notch in the CALPAK is referenced to the small notch in the carrier. The small notch of the carrier must be aligned with the small notch in the socket.
CAUTION:
ANY TIME THE CALPAK IS INSTALLED BACKWARDS AND THE IGNITION SWITCH IS TURNED ON, THE CALPAK IS DESTROYED.
5. Install the CALPACK by pressing on the CALPAK carrier until it is firmly seated in the socket. Do not press on the CALPAK, only the carrier.
6. Install ECM access cover.
7. Install ECM and perform a DIAGNOSTIC CIRCUIT CHECK to confirm proper installation.