Distributor Replacement:
REMOVAL
1. Remove high tension leads.
2. Disconnect wiring harness.
3. Turn crankshaft to #1 cylinder TDC.
4. Remove mounting bolts and lift off distributor. Do not turn engine while distributor is removed.
INSTALLATION
Install in the reverse order of removal and note the following:
1. Coat the O-ring with engine oil.
2. Ensure that #1 cylinder is at TDC.
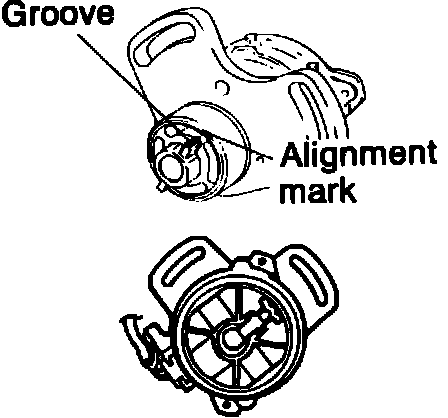
3. Align distributor drive blade and rotor as shown on image.
4. After installation, adjust ignition timing.
5. Tighten mounting bolts to 14 - 19 ft lb (19 - 25 Nm).