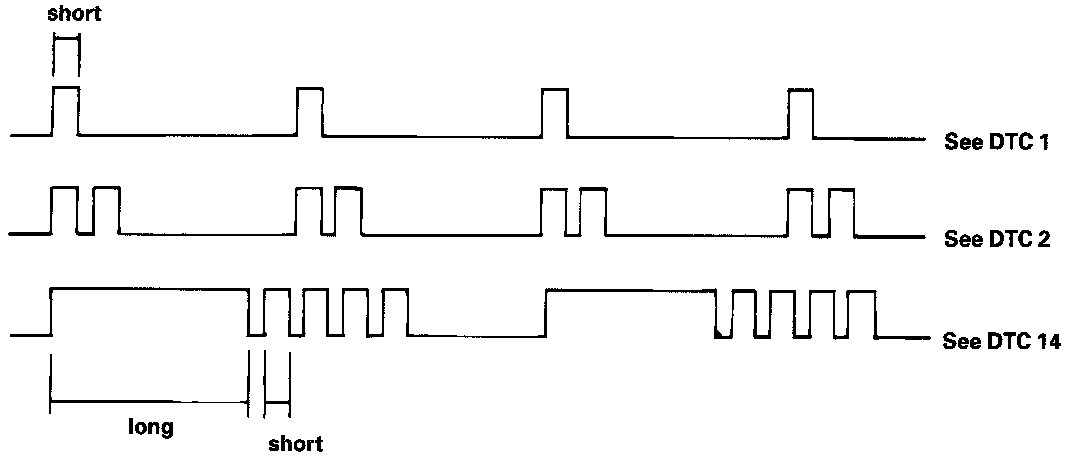
Codes 1 through 9 are indicated by individual short blinks, codes 10 through 15 are indicated by a series of long and short blinks. One long blink equals 10 short blinks. Add the long and short blinks together to determine the code. After determining the code, refer to the Electrical System Symptom-to-Component Chart.
Some Programed Fuel Injection (PGM-FI) problems will also make the D4 Indicator Light come on. After repairing the PGM-FI system, disconnect the CLOCK RADIO fuse (10 A) in the Under-Hood Fuse/Relay Box for more than 10 seconds to reset the TCM memory.
NOTE: Disconnecting the CLOCK RADIO fuse also cancels the Radio Anti-theft code, preset stations and the Clock setting. Get the customer's code number and make note of the radio presets before removing the fuse so you can reset them.
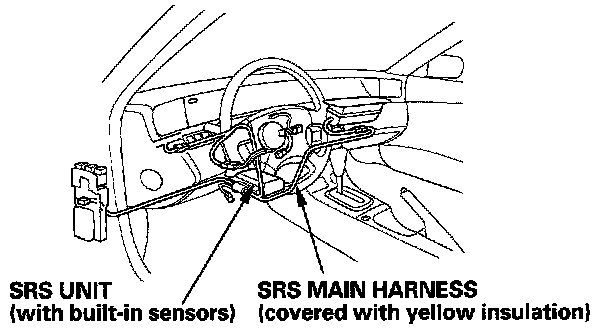
CAUTION: All Supplemental Restraint System (SRS) Wire Harnesses are covered with yellow insulation. Before you disconnect any part of an SRS Wire Harness, connect the Short Connectors.
WARNING: Whenever the Ignition Switch is "ON", or has been turned "OFF" for less than three minutes, be careful not to bump the SRS unit; the Airbags could accidentally deploy and cause damage or injuries. For additional precautions, refer to Airbags, Arming/Disarming.
Inspection For Failure Codes Requiring Use of Test Harness (O7LAJ-PT3O1OA)
1. Remove the Right Door Sill Molding, Door Trim and right side kick panel.
2. Pull the carpet back to expose the TCM.
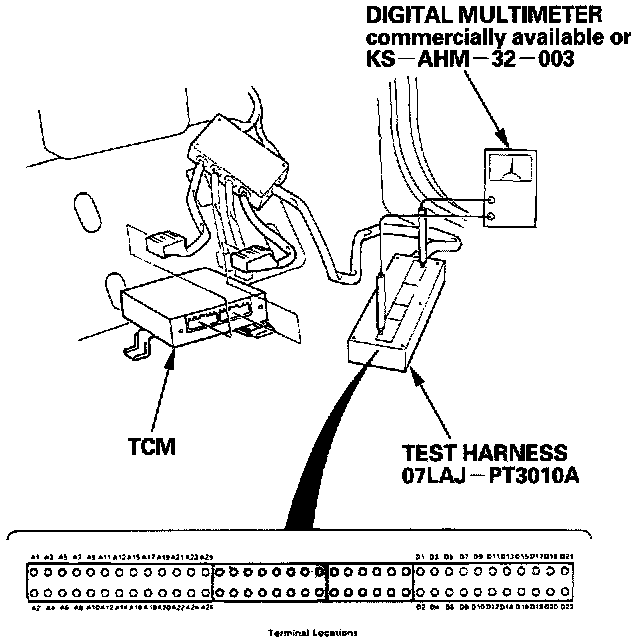
3. Connect the Wire Harness to the Test Harness, and/or connect the Test Harness to the TCM according to the Troubleshooting Flowchart.
NOTE:
- Only the A and D Terminals of the Test Harness are used for Automatic Transmission (A/T) troubleshooting.
- Unless otherwise noted, use only the Digital Multimeter, KS-AHM-32-003 or equivalent, for testing.
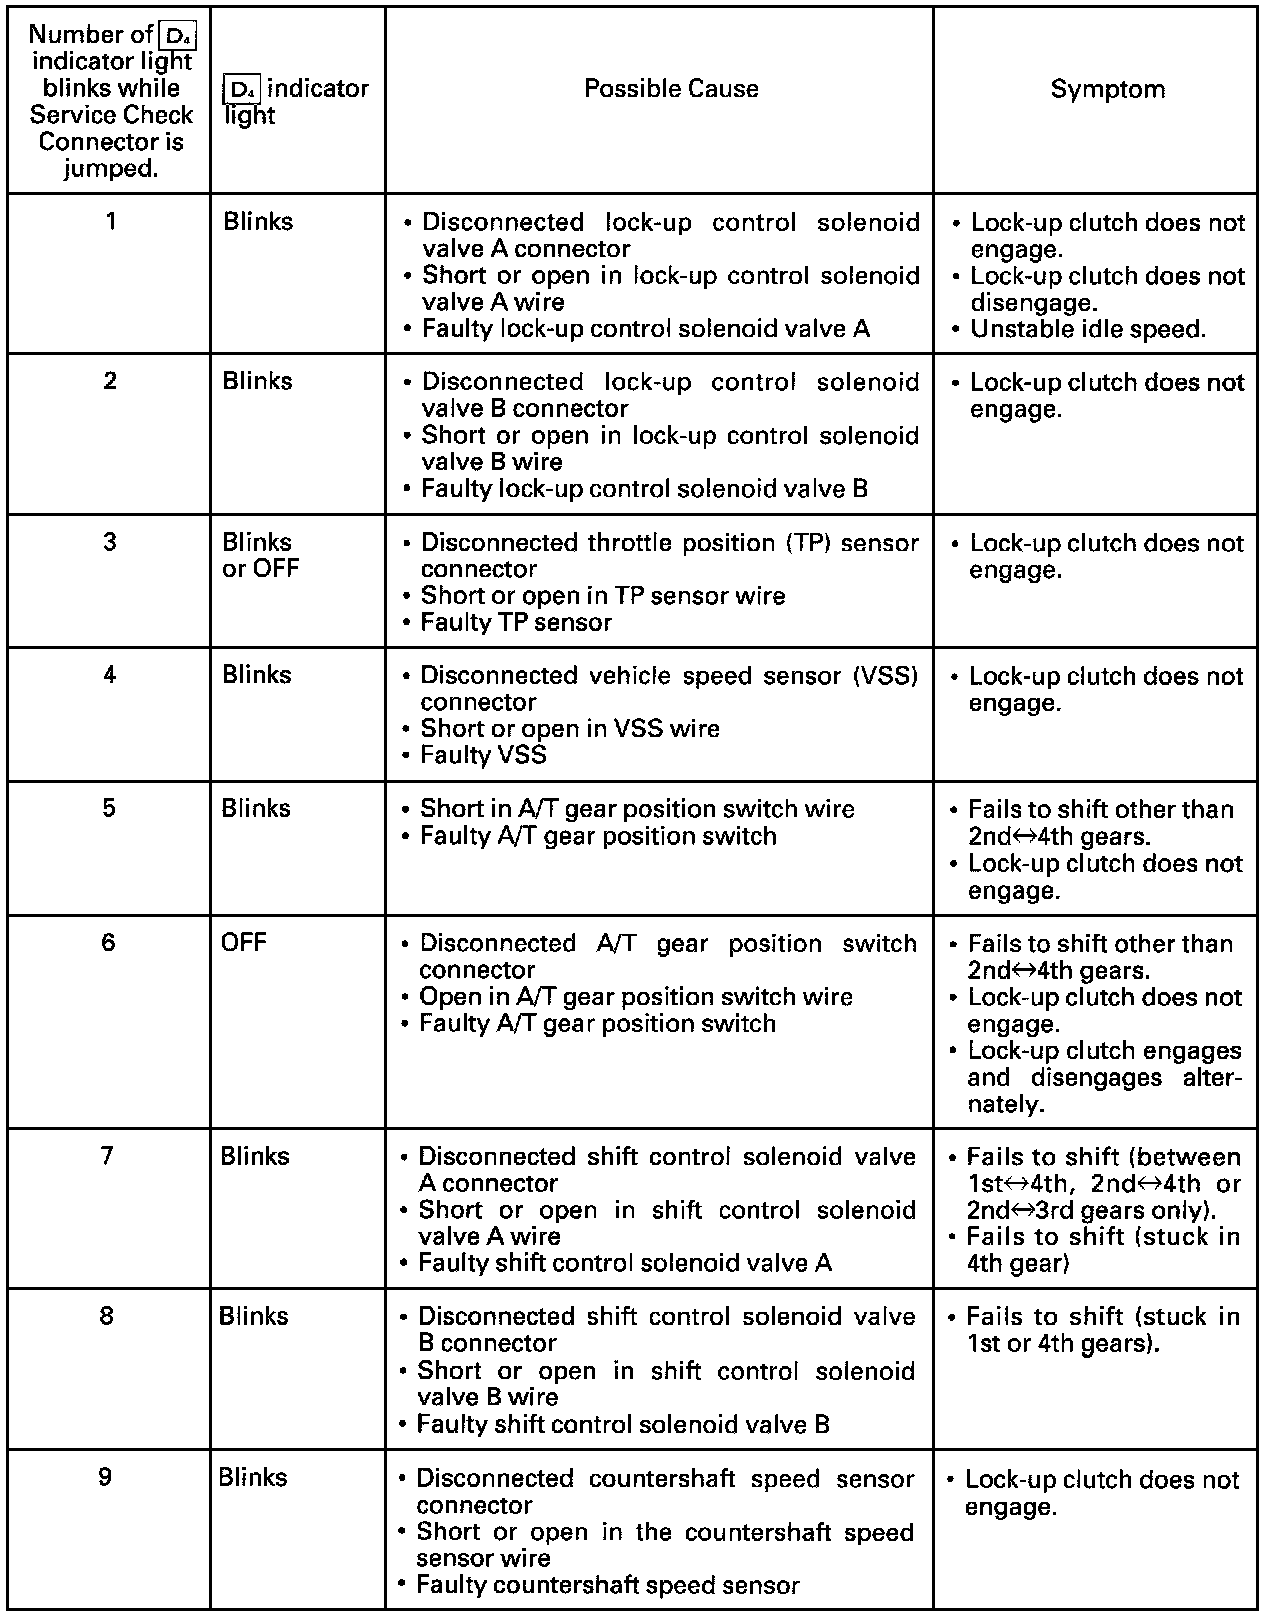
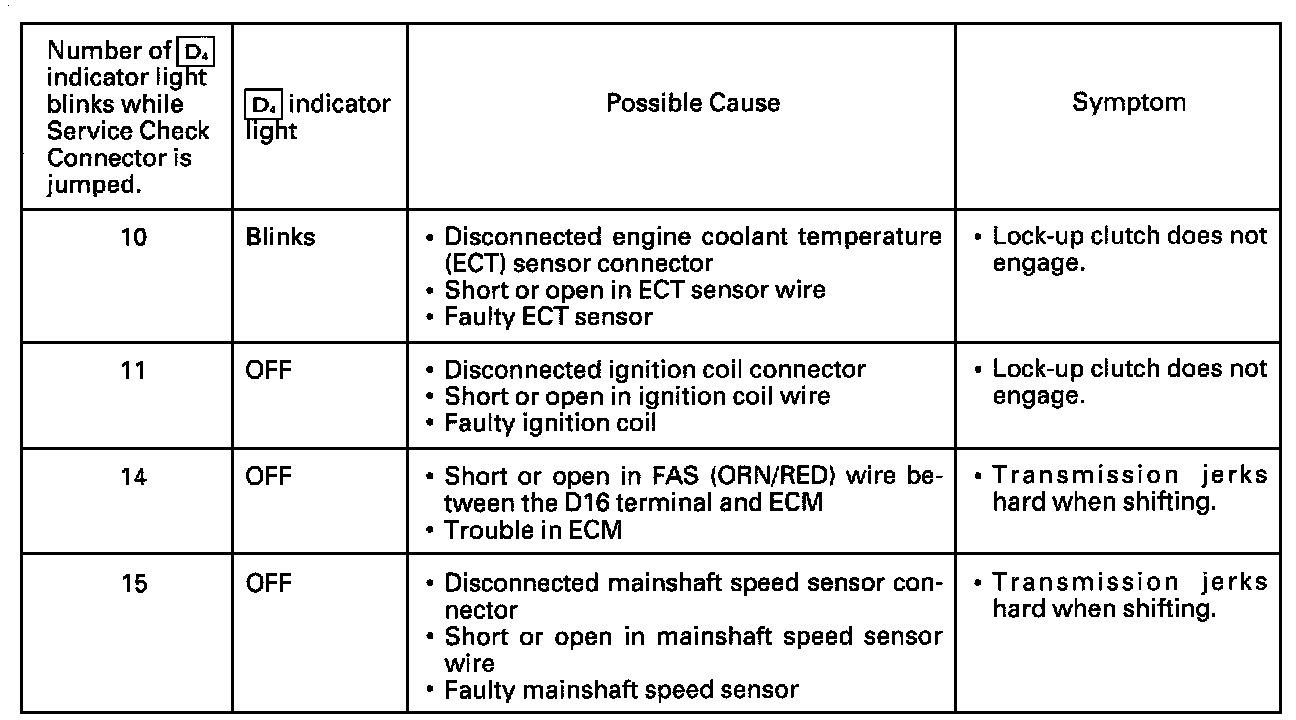
If the Self-Diagnosis D4 Indicator Light does not blink, perform an inspection according to the table.
If a customer describes the symptoms for codes 3, 6, or 11, yet the D4 Indicator Light is not blinking, it will be necessary to recreate the symptom by test driving, and then checking the D4 Indicator Light with the Ignition still "ON".
If the D4 Indicator Light displays codes other than those listed, or stays lit continuously, the Transmission Control Module (TCM) is faulty.
Sometimes the D4 Indicator Light and the Malfunction Indicator Lamp (MIL) /Check Engine light may come on simultaneously. If so, check the Programmed Fuel Injection (PGM-FI) System according to the number of blinks on the MIL/Check Engine Light, then reset the memory by removing the CLOCK RADIO fuse in the Under-Hood Fuse/Relay Box for more than 10 seconds. Drive the vehicle for several minutes at speed over 30 mph (50 km/h), then recheck the MIL/Check Engine Light.
NOTE: Disconnecting the CLOCK RADIO fuse also cancels the Radio Anti-Theft code, preset stations and the Clock setting. Get the customer's code number and make note of the Radio presets before removing the fuse so you can reset them.