Fuel Level Sensor Replacement
Removal Procedure
1. Remove the fuel tank module. Refer to Fuel Tank Module Replacement Service and Repair.
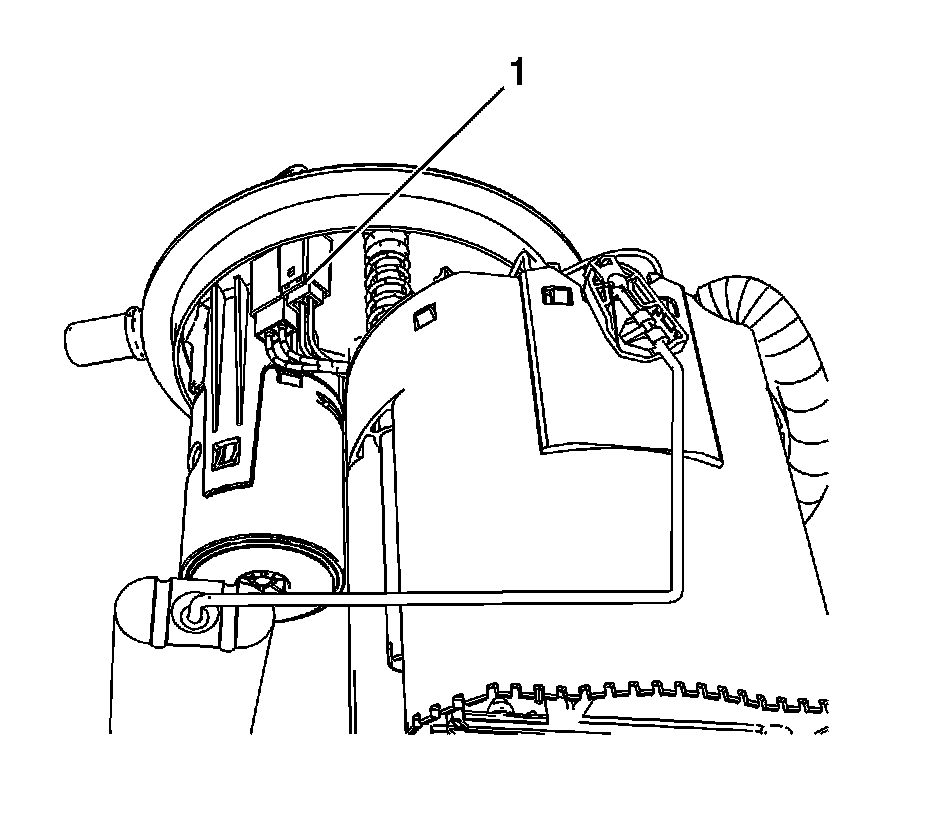
2. Push down on the fuel level sensor electrical connector tab (1), disengaging the retainer, and disconnect the electrical connector.
3. Remove the fuel level sensor wiring from under the module clip (2).
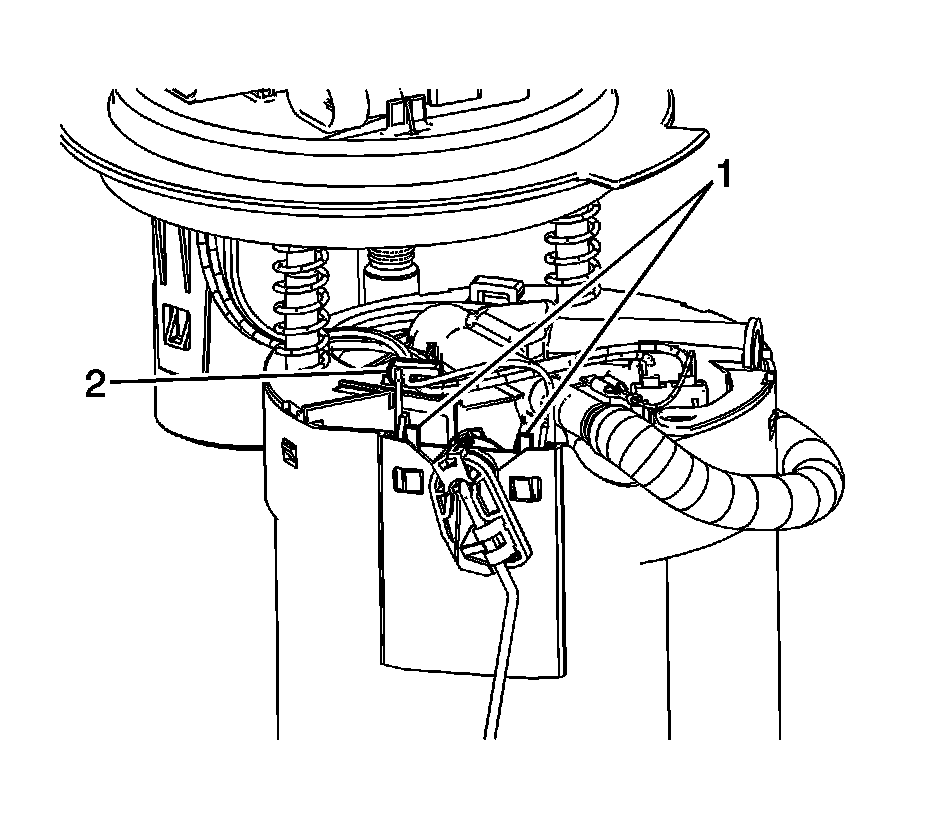
4. Push in the fuel level sensor tabs (1) disengaging the sensor clips from the module bucket.
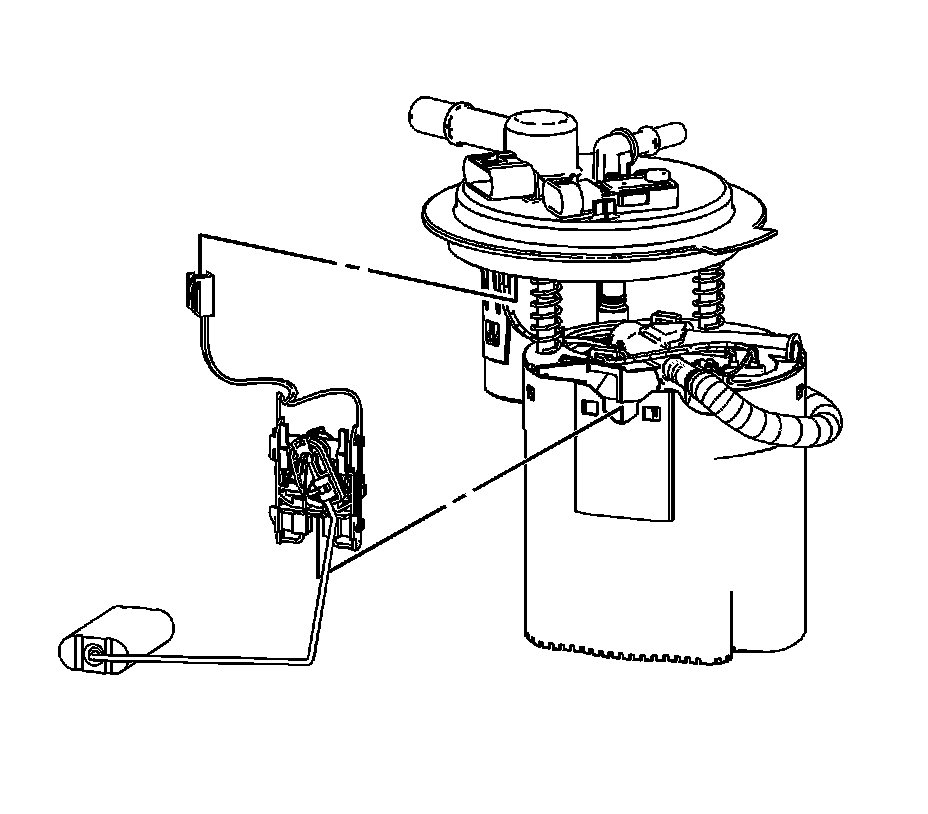
5. Slide the fuel level sensor up out from the module bucket.
Installation Procedure
1. Position the fuel level sensor to the module bucket and slide the sensor down.
2. Ensure that the fuel level sensor tabs (1) engage the module bucket.
3. Install the fuel level sensor wiring under the module clip (2).
4. Connect the fuel level sensor electrical connector (1) to the module cover.
5. Install the fuel tank module. Refer to Fuel Tank Module Replacement Service and Repair.